# Content
# Introduction
TODO
There are just 2 minimum things to do which are:
- Create content types
- Managing your content
With these things you will achieve your own business framework without messing around with object and ...
Using WeOmni Content you can manage brand and shop managements in less than 10 minutes.
# Creating Content Type
This process will guide you to creation of content type, if you already know how to create content type then you can Skip this process, and if you haven't create any project yet please goto Starter Guide.
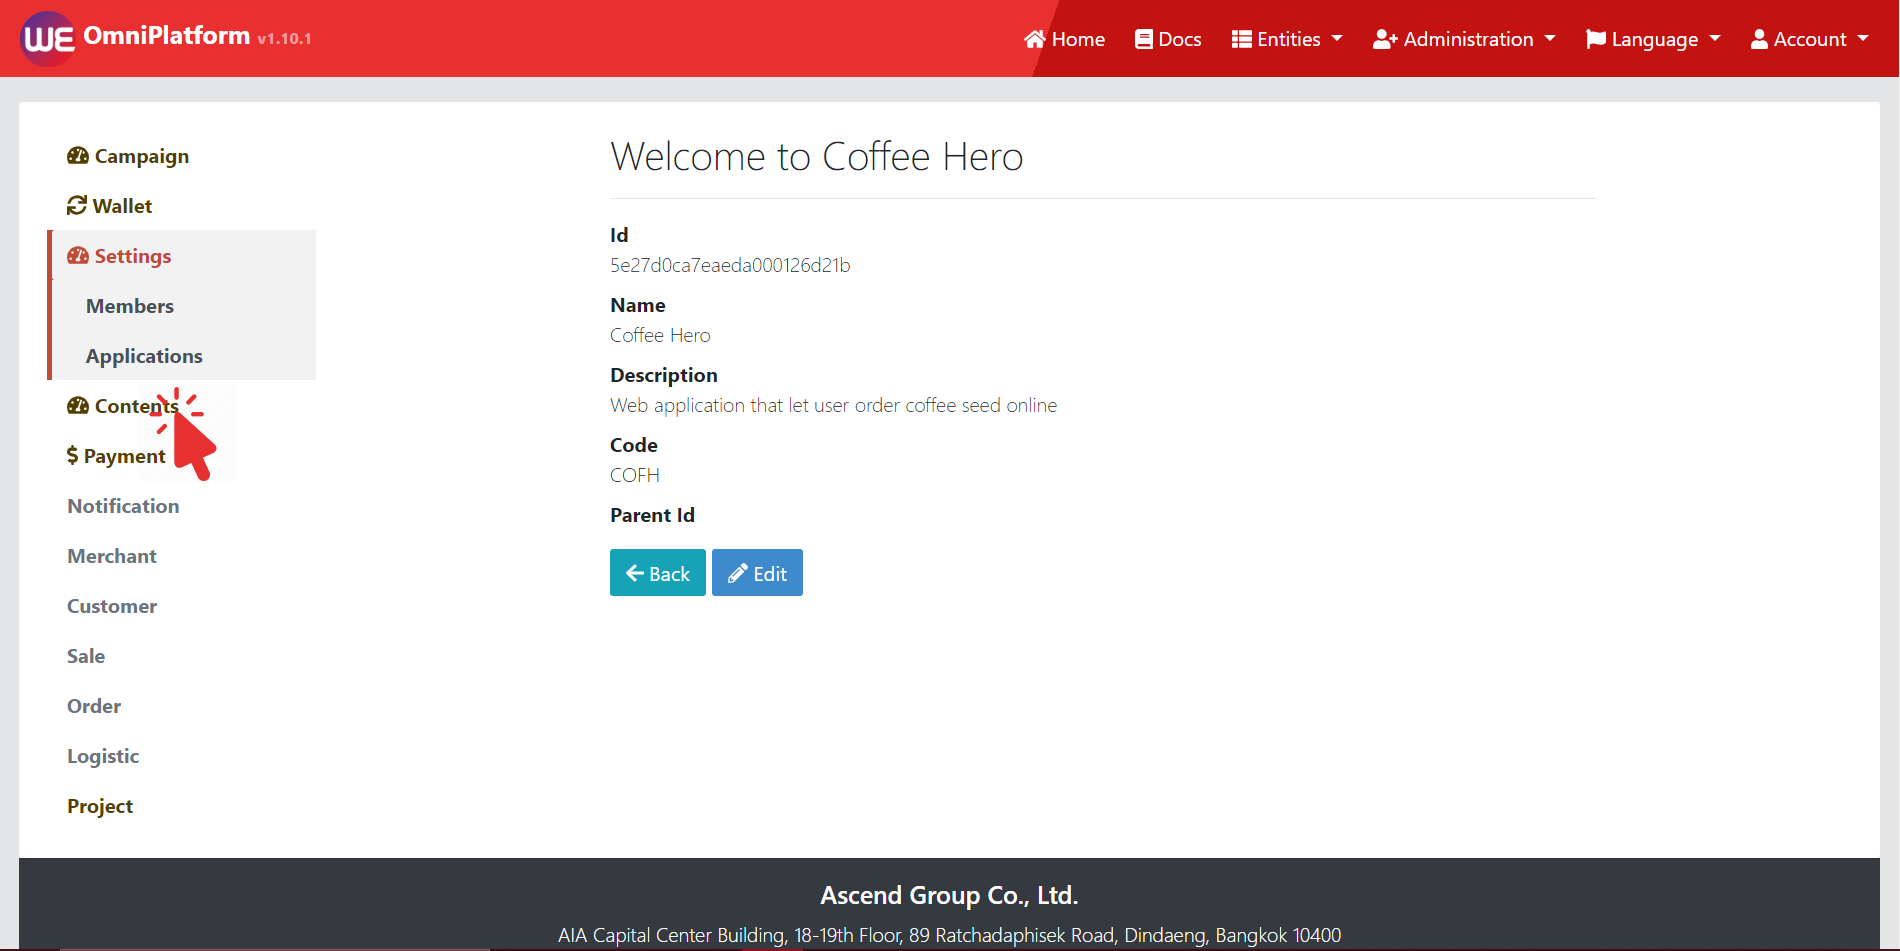
After completion of creating a project, you will navigated to project's dashboard where several project management options are available according to your account level
On right side, there are management options. Click at Content
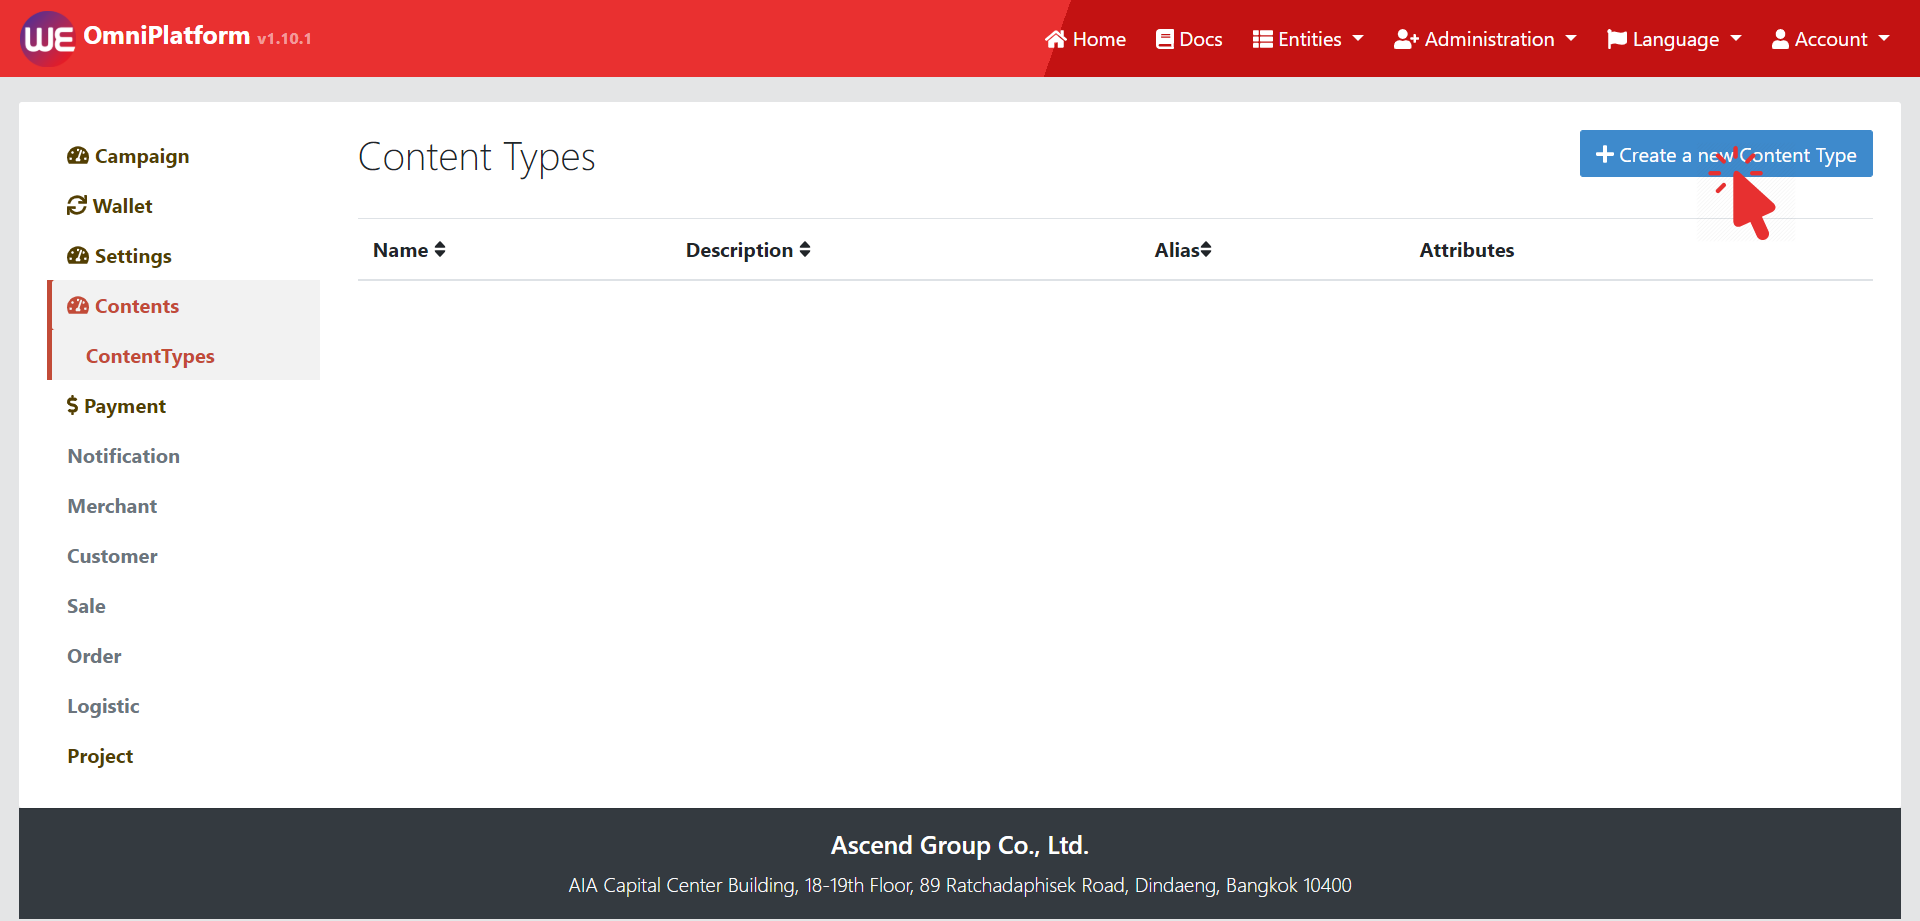
- You will navigated to Content list, then click at top-right button that labeled as plus sign with text "Create a new Content Type"
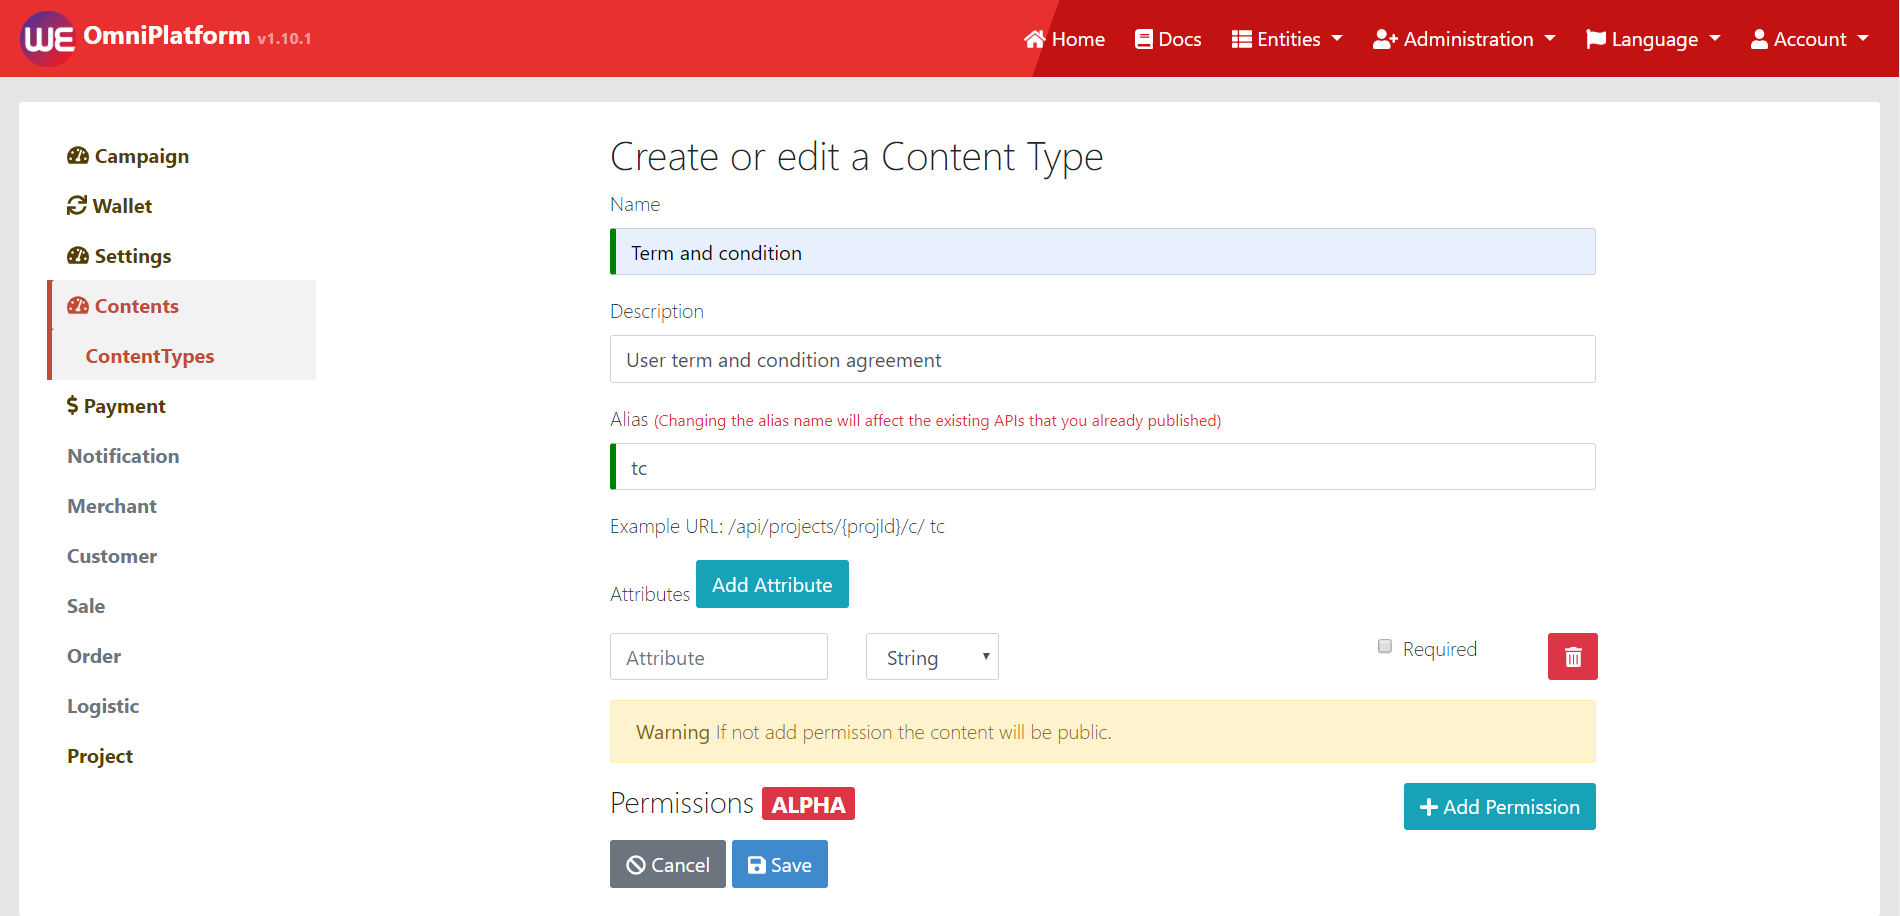
- Fill the creation form, if you have any question about Content type creation please visit below section Basic content type setup
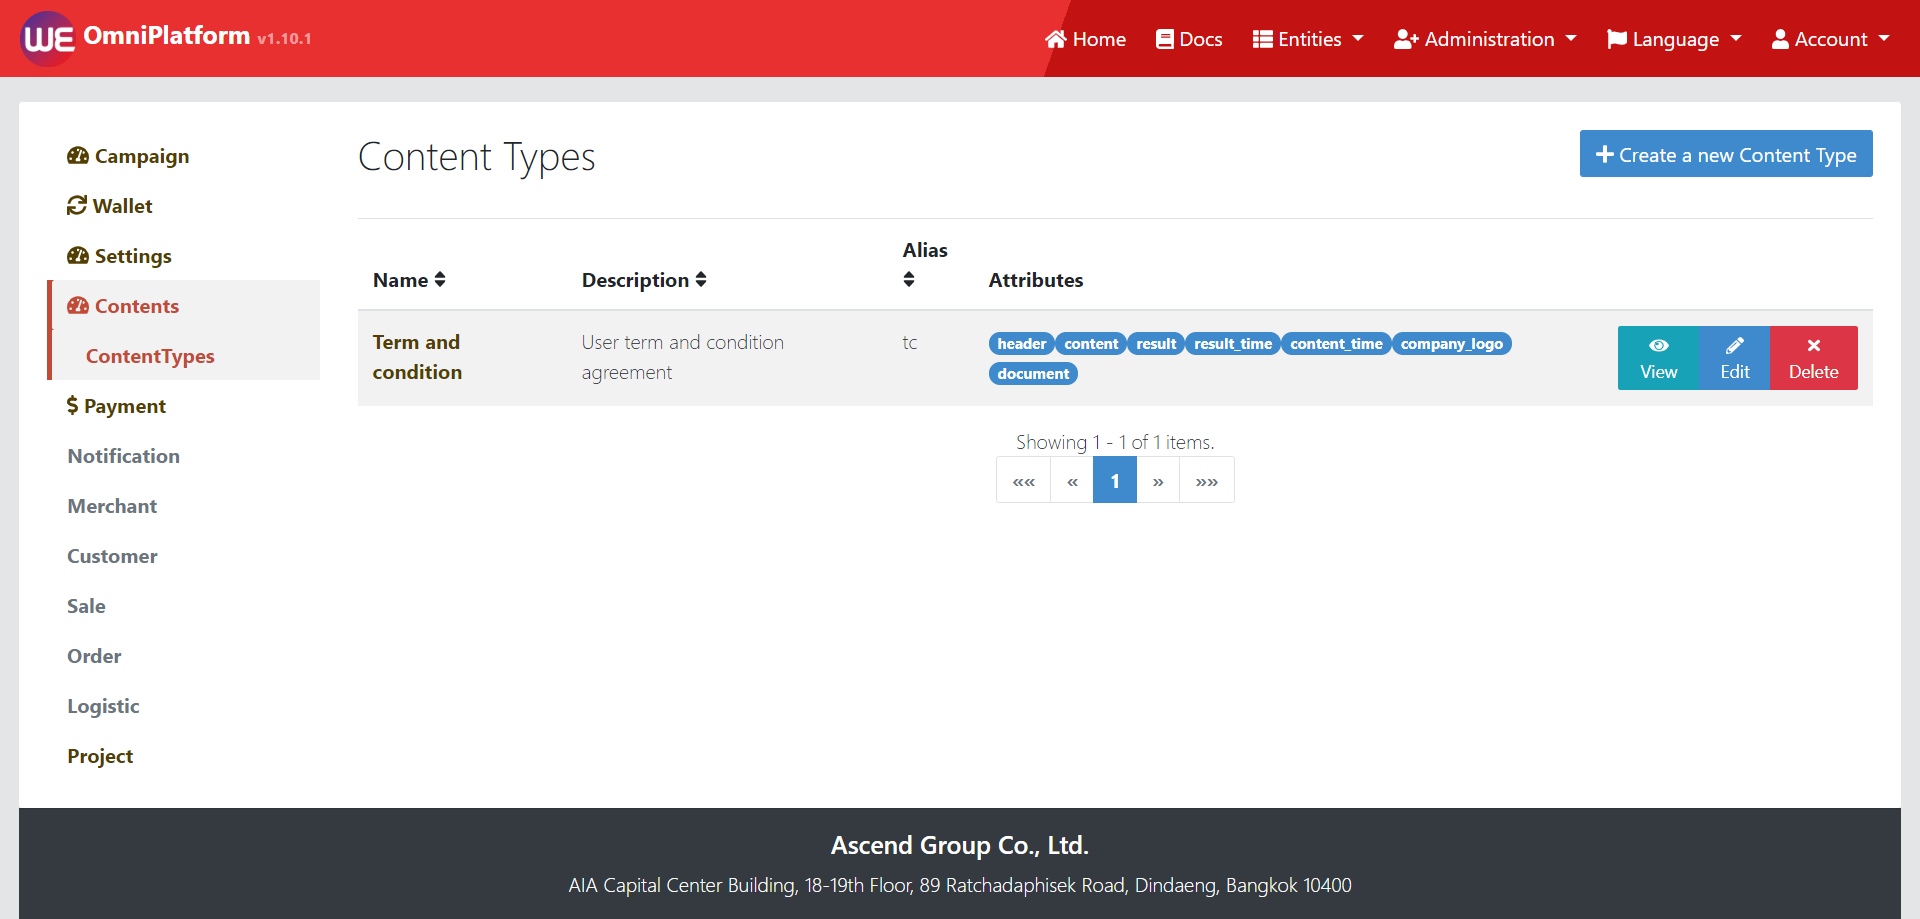
- Now you will see your Content displayed in Content list
# Create Content
After you successfully create content type, you will be navigated to content list page where created content type is laying in the list. The following steps will lead you to creation of Content.
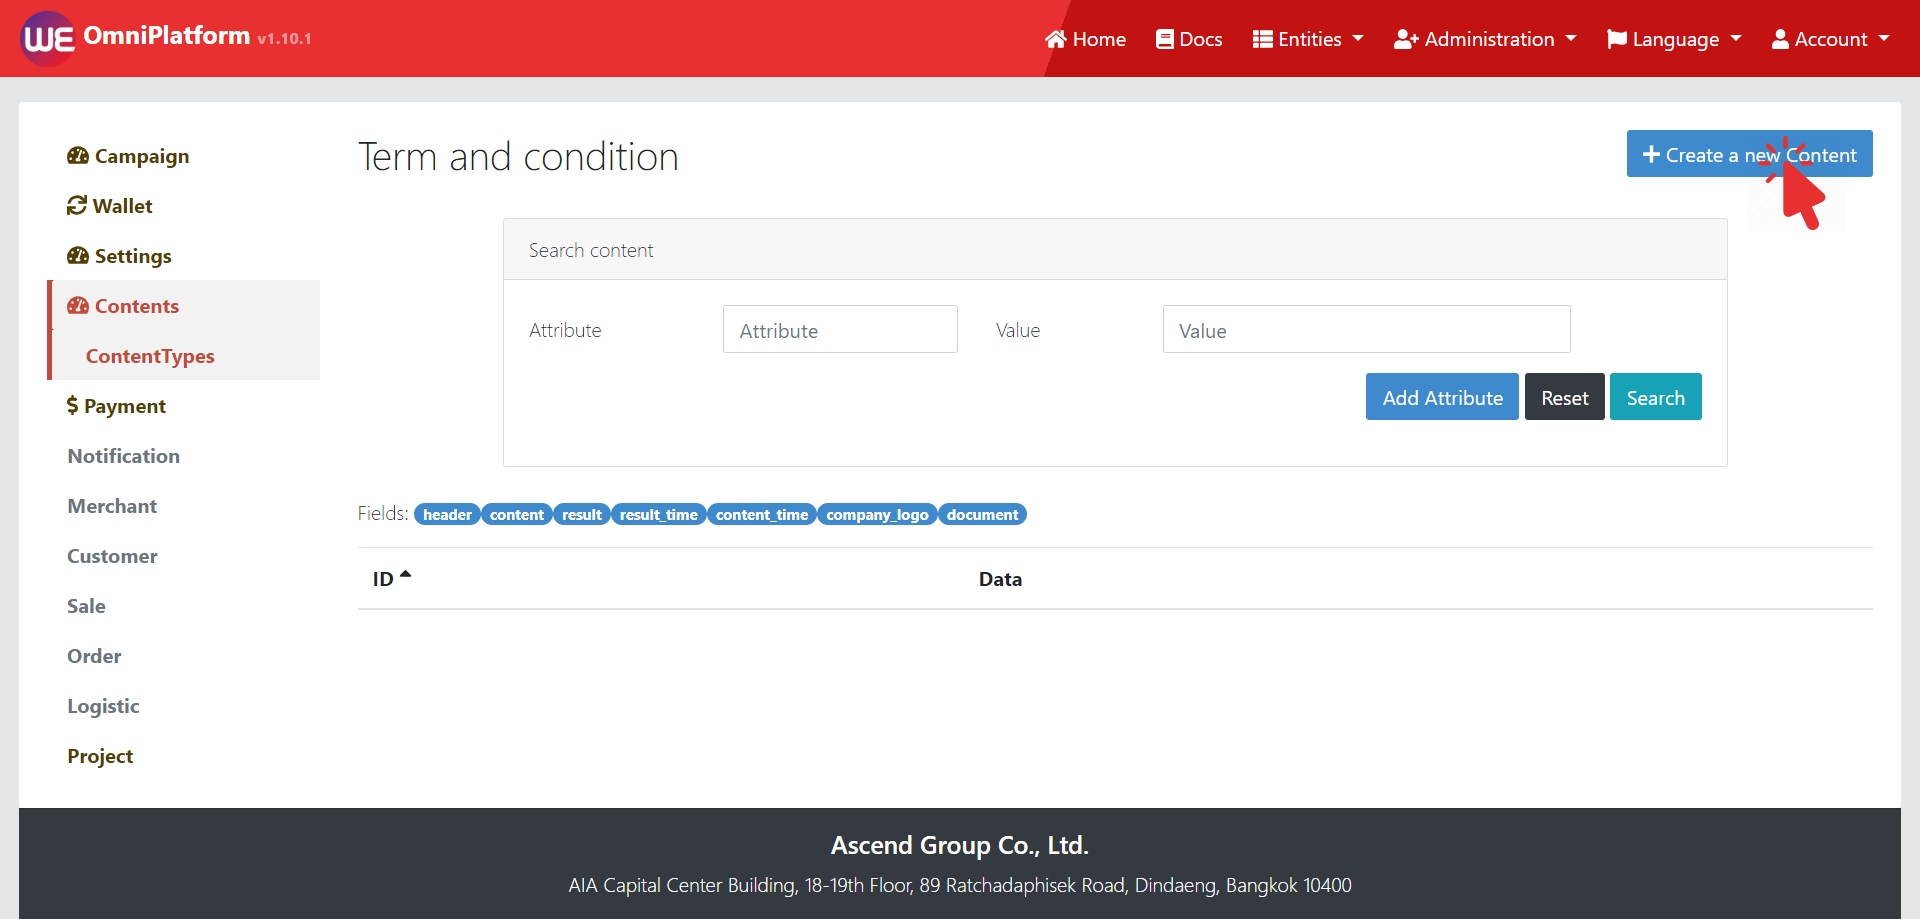
- By seeing content type in the content list page, Click at the name of your created content type

- Now you are inside created content type where you can search for the contents by content's attributes and also create a new content by clicking "Create a new Content" button
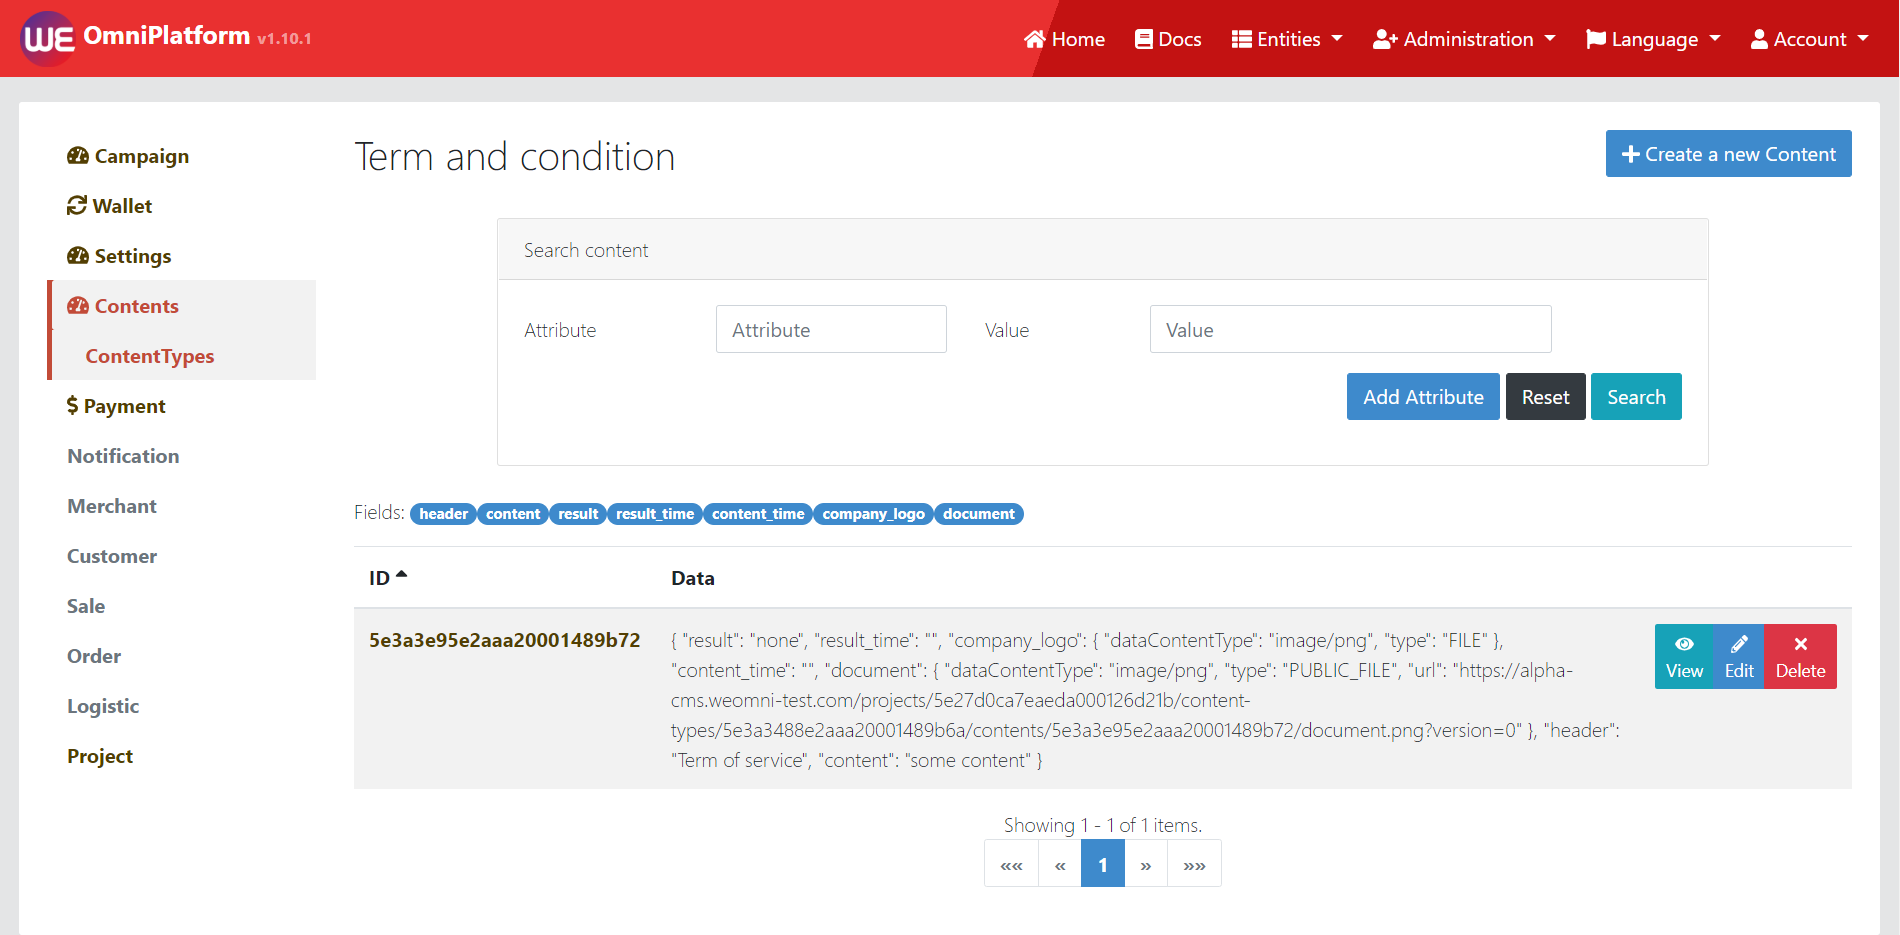
- Fill the content form which it's fields are the content type's attributes

4.After you submit the content form, you will see the created content in the list which started by content's ID
# Basic Content Type Setup
Content Basic Fields Table
| Field Name | Description |
|---|---|
| Name | Name of the content |
| Description | The overview explanation of the the content |
| Alias | API's name of the content type |
| Attributes | Attributes that the content type can operate, Attribute details |
| Permissions | You can set permission for the content type, Permission details |
# Attribute details
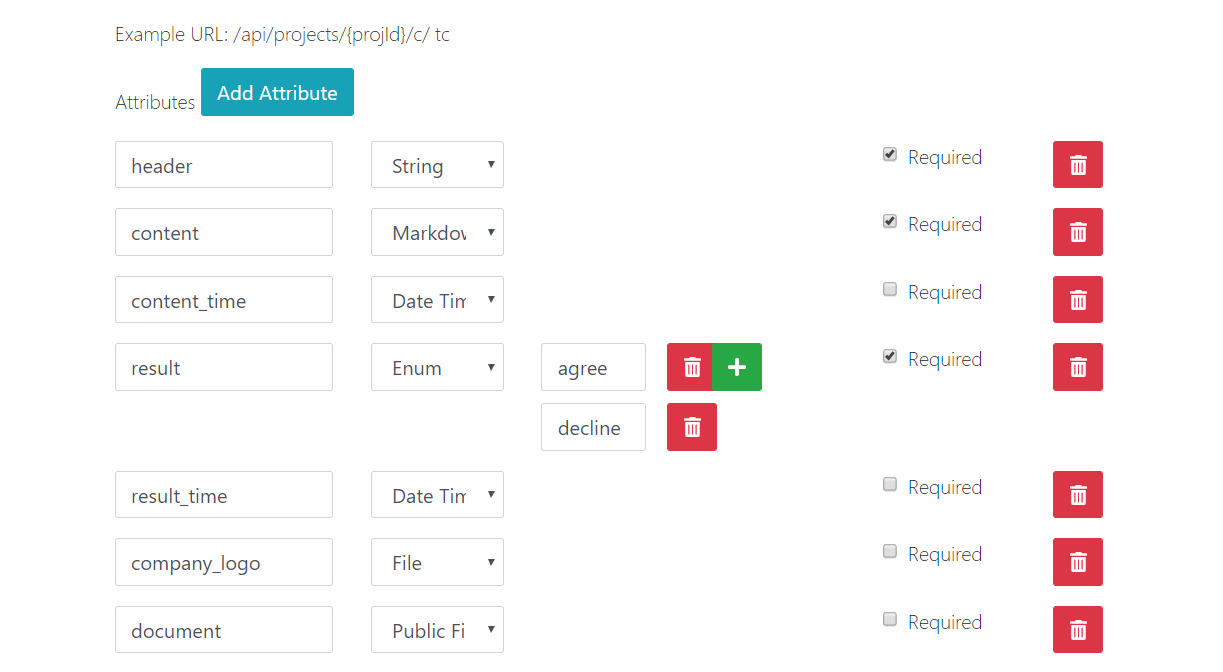
By clicking at "Add Attribute", a row of attribute form is generated which consists of 3 fields
- Attribute - attribute's key
- Parameter type - value's data type
- Required - check box that is representing the field is required or not
- Pattern - If select type STRING can be add regular expression for validate in field (Now allow only Api)
- Unique - check box that is representing the field is unique or not and if checked more than one attribute will combine unique key (Now allow only API)
Attribute parameter type
| Field Name | Description |
|---|---|
| String | Only characters or symbols are allow |
| Decimal | Only number or number with decimal point are allow |
| File | Allow to upload a file |
| Markdown | Allow to enter paragraph or long text with color and style |
| Public File | Allow to upload a downloadable file |
| Enum | Allow to have preset of options and only one option can be selected |
| Date time | Allow to enter date and time format |
| Point location | Allow to enter location co-ordinate |
# Full Text Search
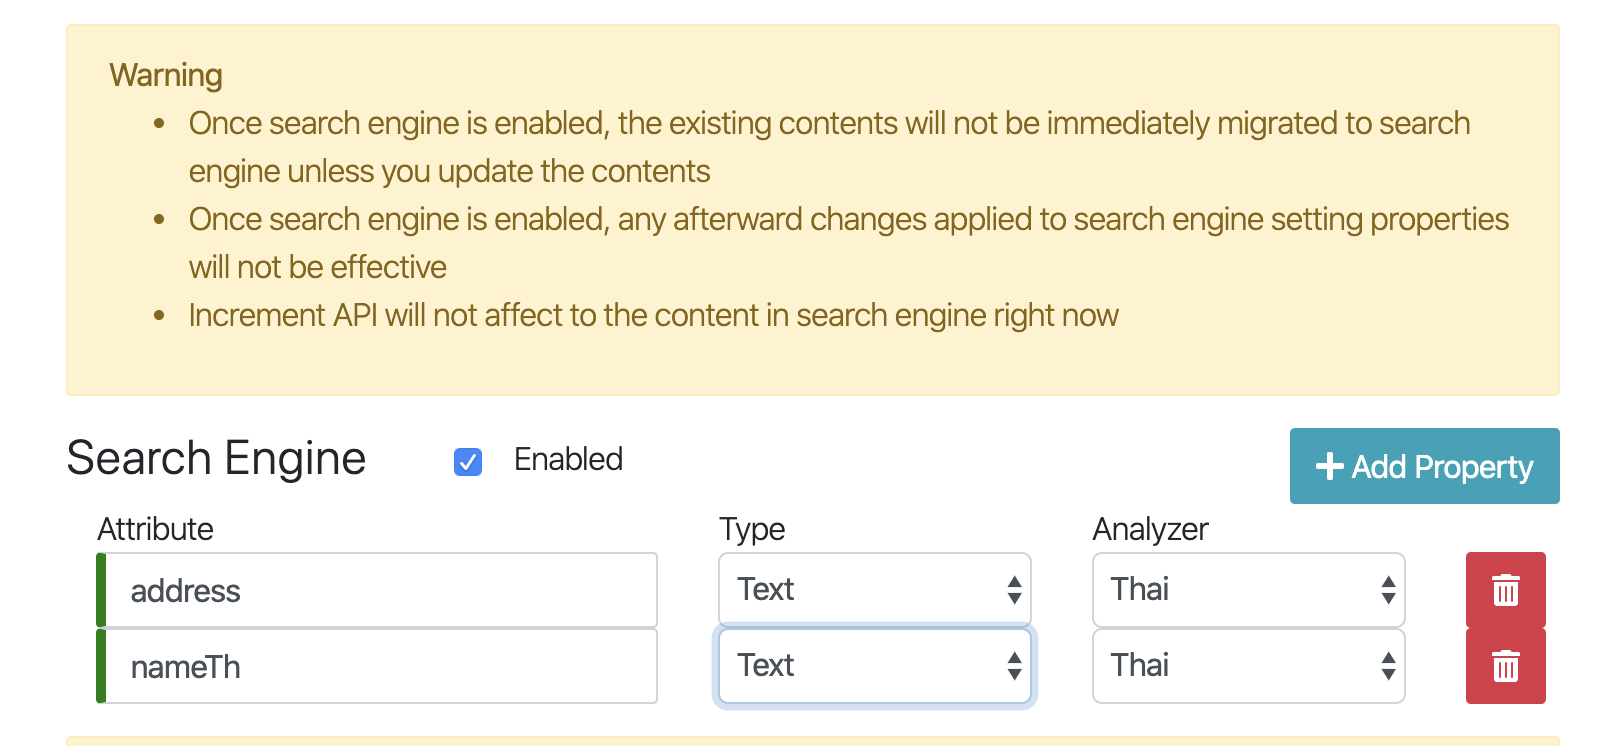
Now, the CMS supoorts full text search for 2 languages which are English and Thai. To use it, please follow the instructions below
- For content type that never set up full text search before, you can go to content type edit page and look at the search engine section
- Check enable check box
- If you would like to do tokennization on specific attributes for example the attribute that the value is Thai language, click add property, put the attribute name that you would like to tokenize in the first field, select the type as text (now we only support this), and select the analyzer as Thai
- Click save button below
Full Text Search API (opens new window)
# Full Text Search Constraint
- Once search engine is enabled, the existing contents will not be immediately migrated to search engine unless you update the contents
- Once search engine is enabled, any afterward changes applied to search engine setting properties will not be effective
- Increment API will not affect to the content in search engine right now
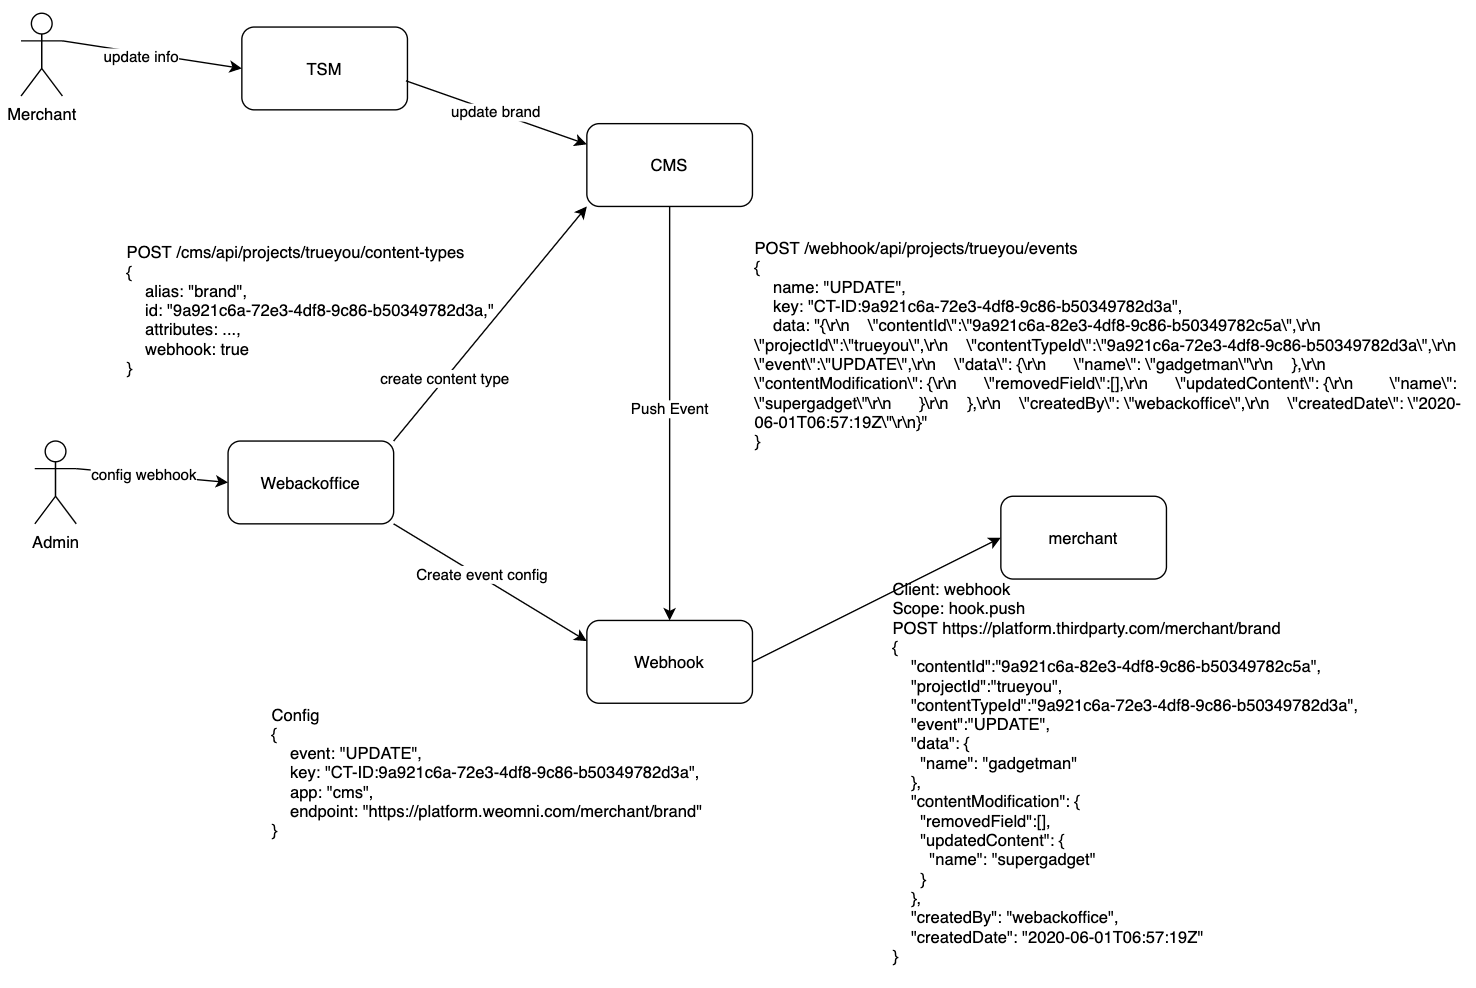
# Webhook
 Now, the CMS supoorts webhook feature. To use webhook, please follw the instructions below
- Navigate to content type details page and go to webhook section
- Check enable check box
- Click Add Webhook button
- Select event name CREATE/UPDATE/DELETE to define trigger point
- Put endpoint to call when the event triggered
- Click save button below
# Full Text Search Constraint
- Once search engine is enabled, the existing contents will not be immediately migrated to search engine unless you update the contents
- Once search engine is enabled, any afterward changes applied to search engine setting properties will not be effective
- Increment API will not affect to the content in search engine right now